Step-by-step guide
How to download your credit reports
AnnualCreditReport.com gives you all three reports for free, once every week. You fill out one form there, then visit each bureau in turn to verify yourself and download your report. The part that matters most is saving each one as a PDF before you leave that bureau’s site, because you only get one look at it.
Getting started
- 1
Go to AnnualCreditReport.com
This is the only federally authorized place to get your reports, and it is genuinely free. Type the address in directly instead of searching for it, so you can’t land on a lookalike.

- 2
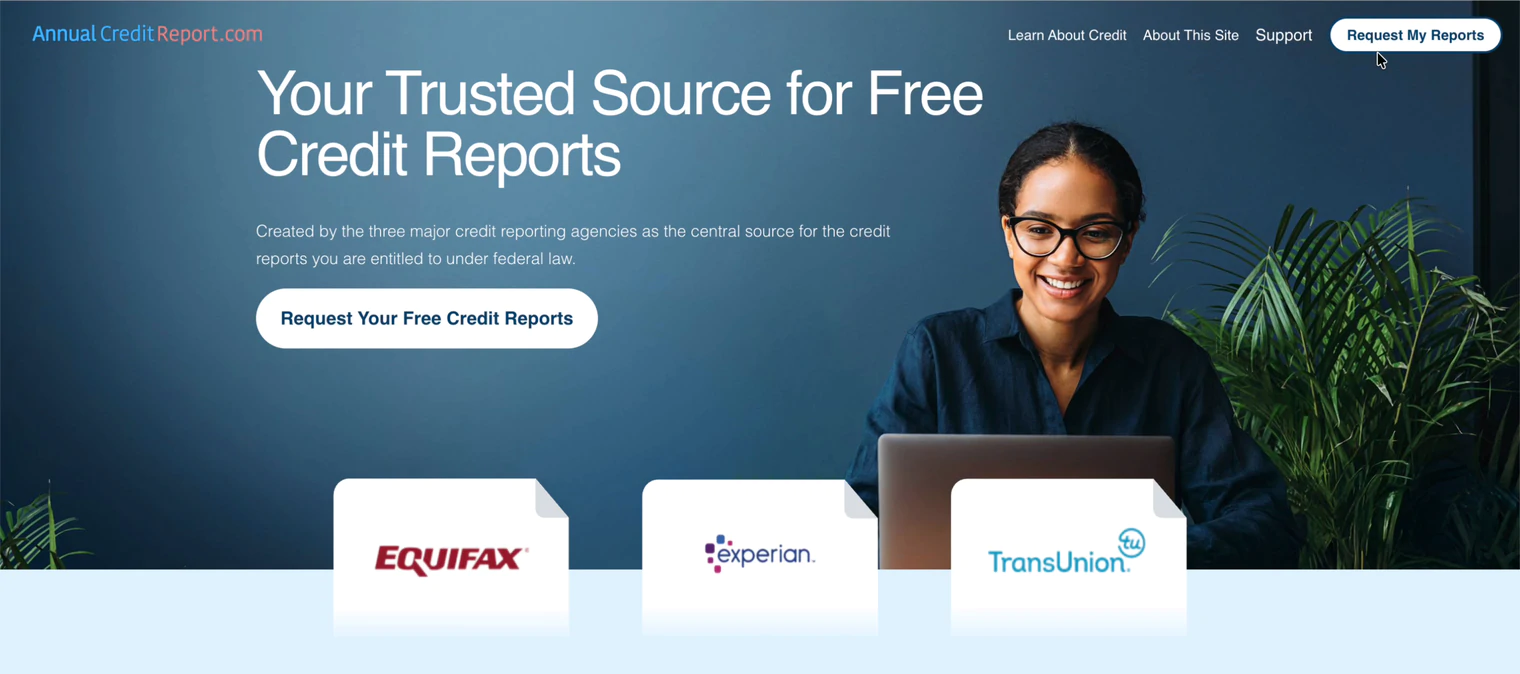
Click “Request Your Free Credit Reports”
It’s the white button in the middle of the homepage. There’s a matching “Request My Reports” button in the top right of every page if you scroll past it.
- 3
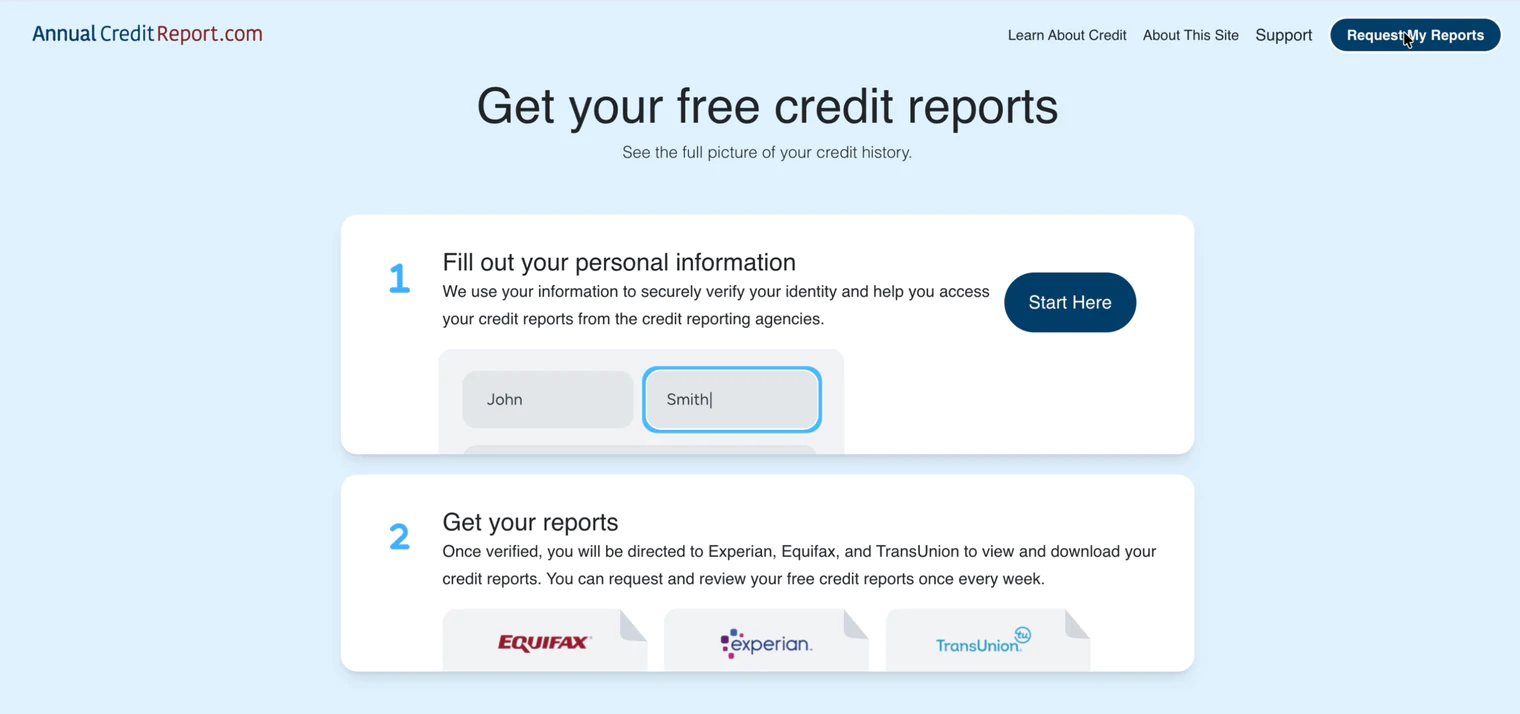
Start with your personal information
AnnualCreditReport.com asks about you first, then sends you off to each bureau one at a time. Click “Start Here” to begin.
- 4
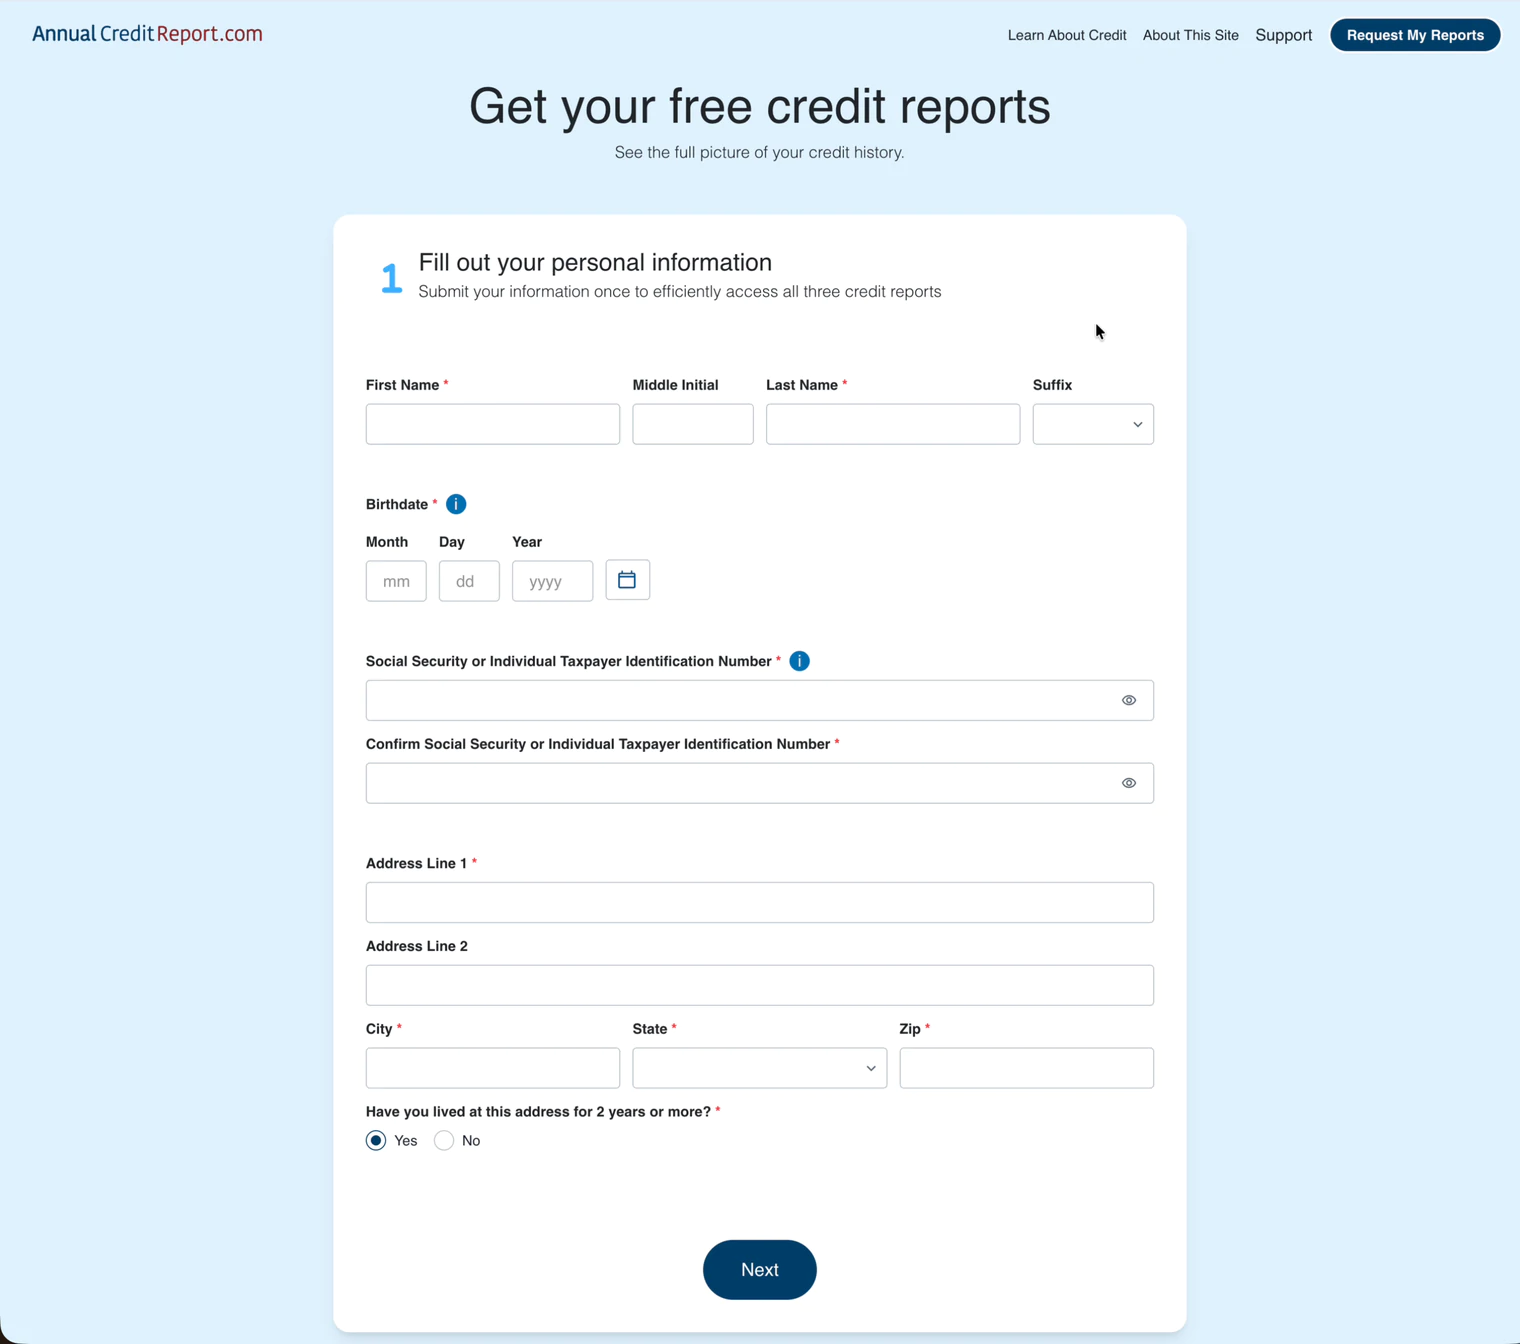
Fill out this form
Your name, birthdate, Social Security number, and current address. One form covers all three bureaus. Then click Next.
Watch the State and Zip fields, since they have to match each other. A few failed attempts and you’ll see “You have exceeded the maximum allowed retries,” which means starting a fresh session from the homepage.
- 5
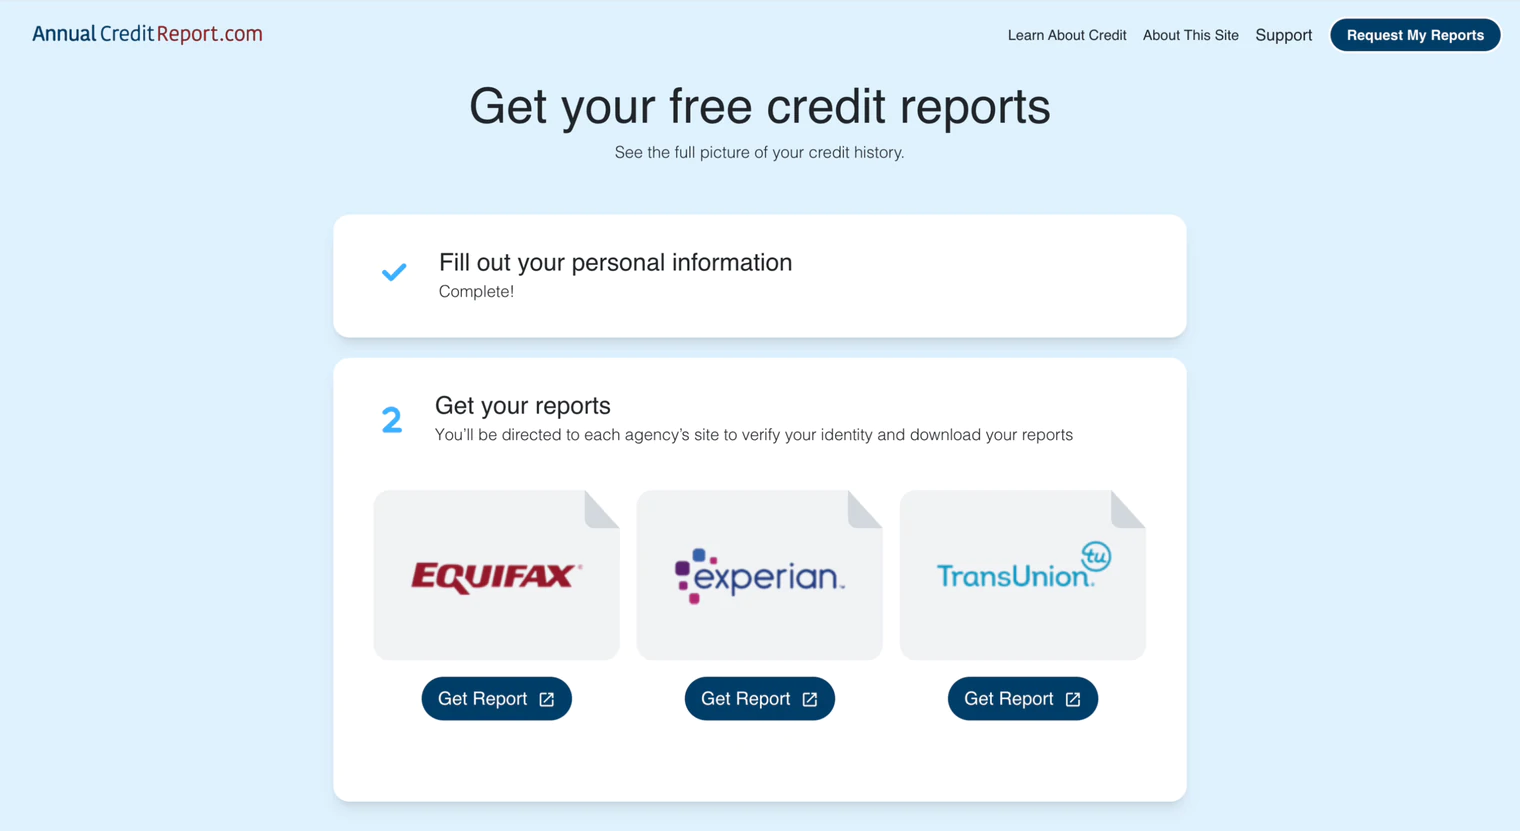
Pick your first bureau
Three bureau cards appear once your form goes through. The order is up to you. We’ll start with Equifax here, so click Get Report under Equifax.
Report 1: Equifax
- 6
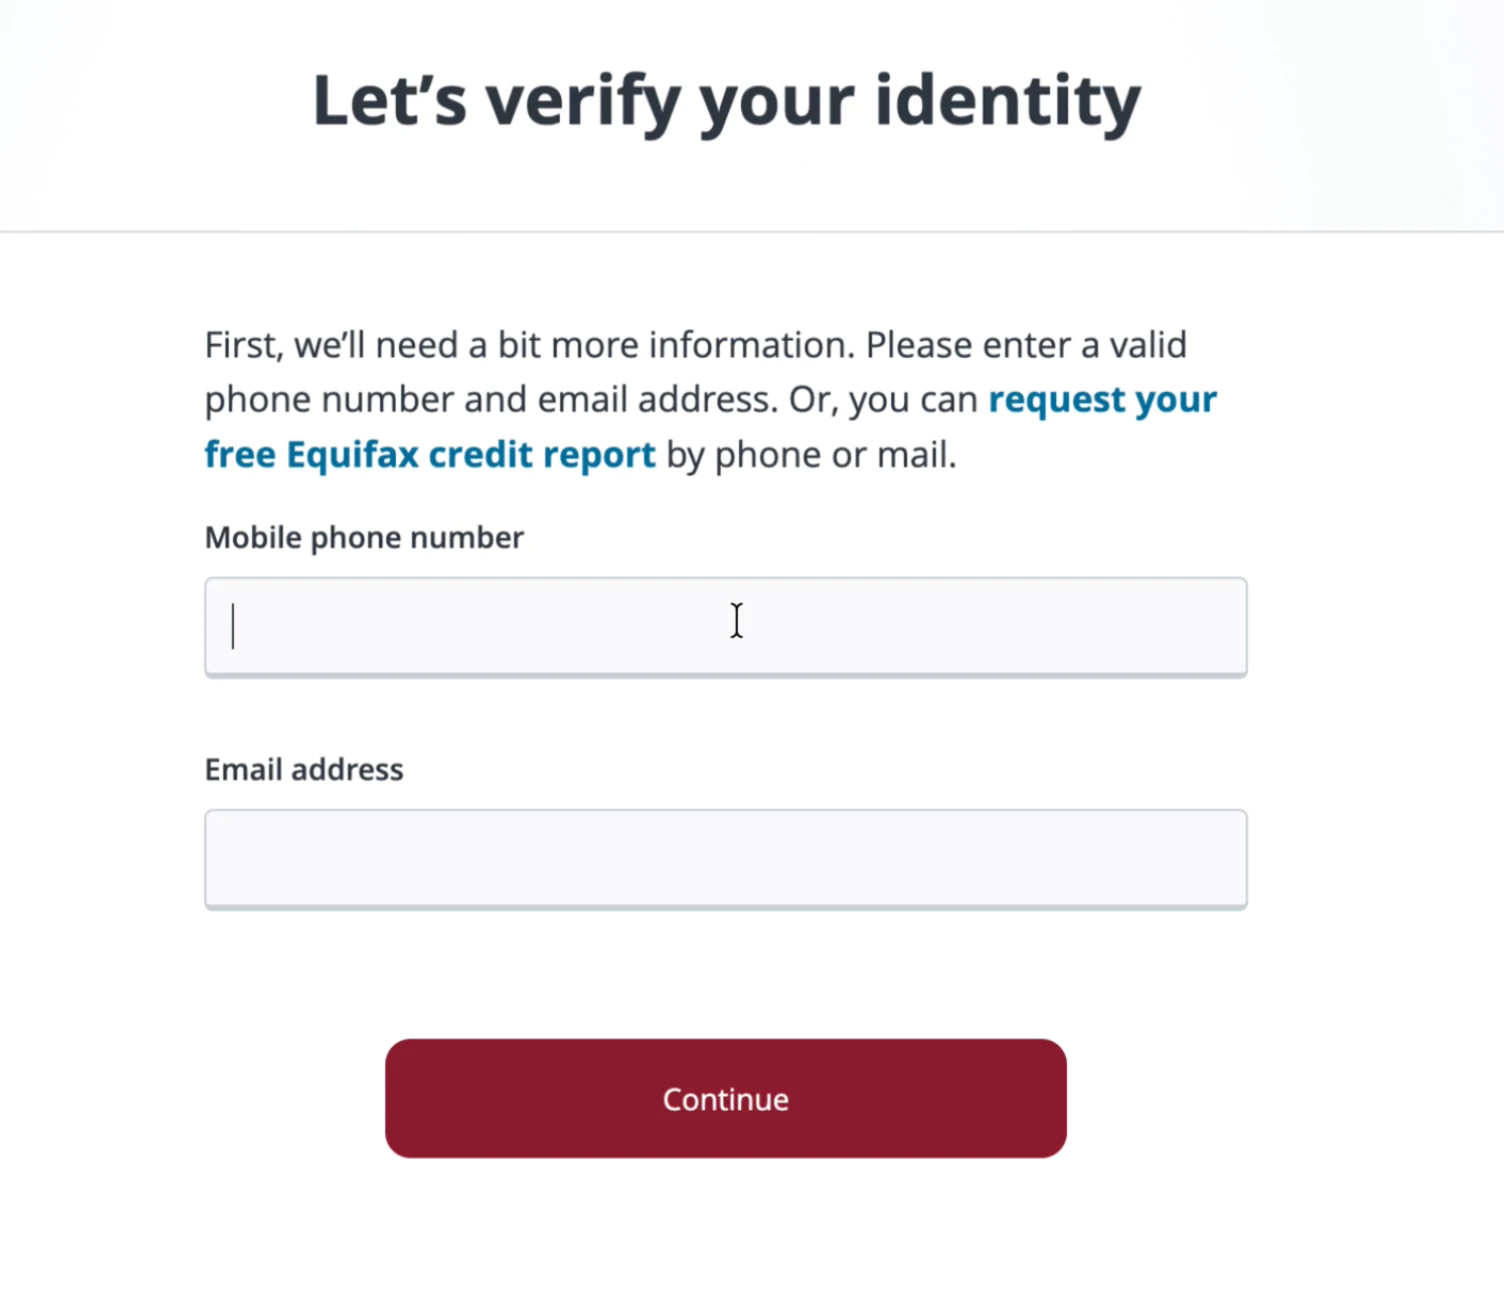
Verify your identity for Equifax
Equifax asks for your mobile number and email address. Fill them in and click Continue.
- 7
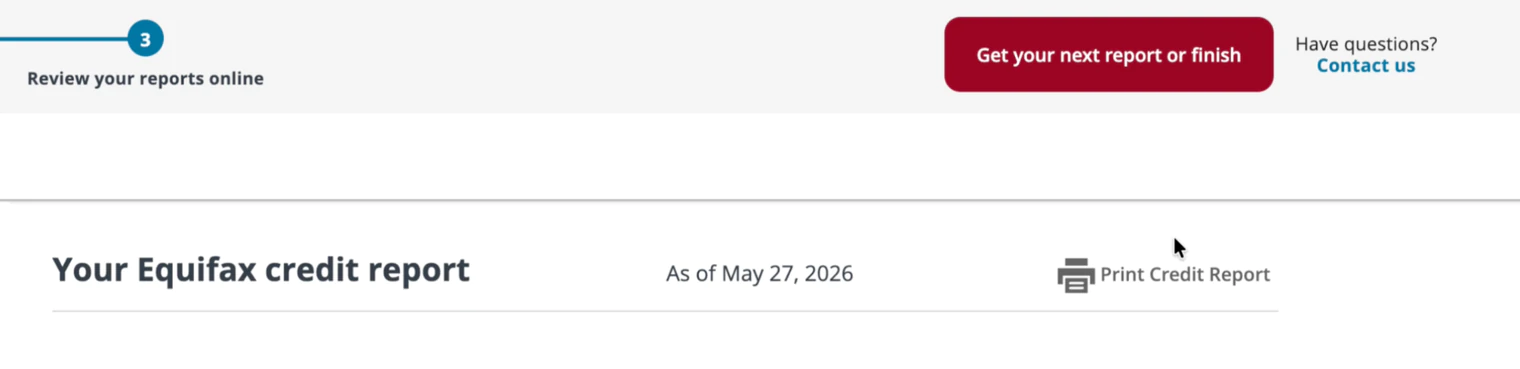
Your Equifax report opens
You’ll land on your report with the date it was generated across the top.
- 8
Click “Print Credit Report”
It’s the small printer icon near the top right of the report. If it looks greyed out, wait up to 30 seconds and it will turn blue.

- 9
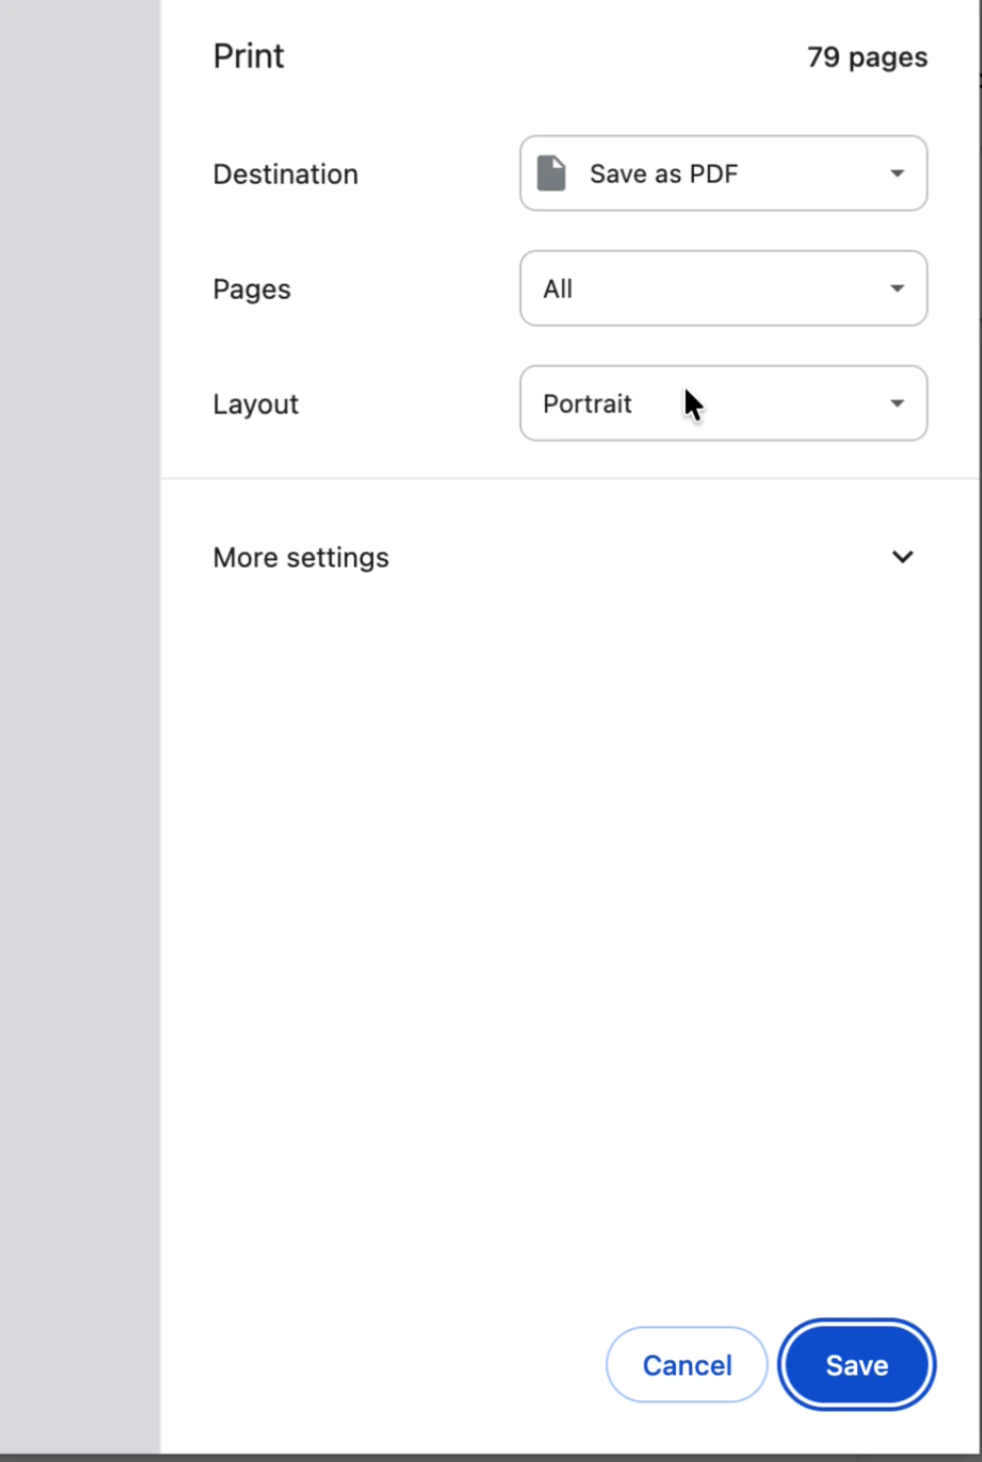
Save it as a PDF
Your browser’s print dialog opens. Set Destination to “Save as PDF” and click Save. Name this one Equifax so you can tell your files apart. Seventy-plus pages is normal.
- 10
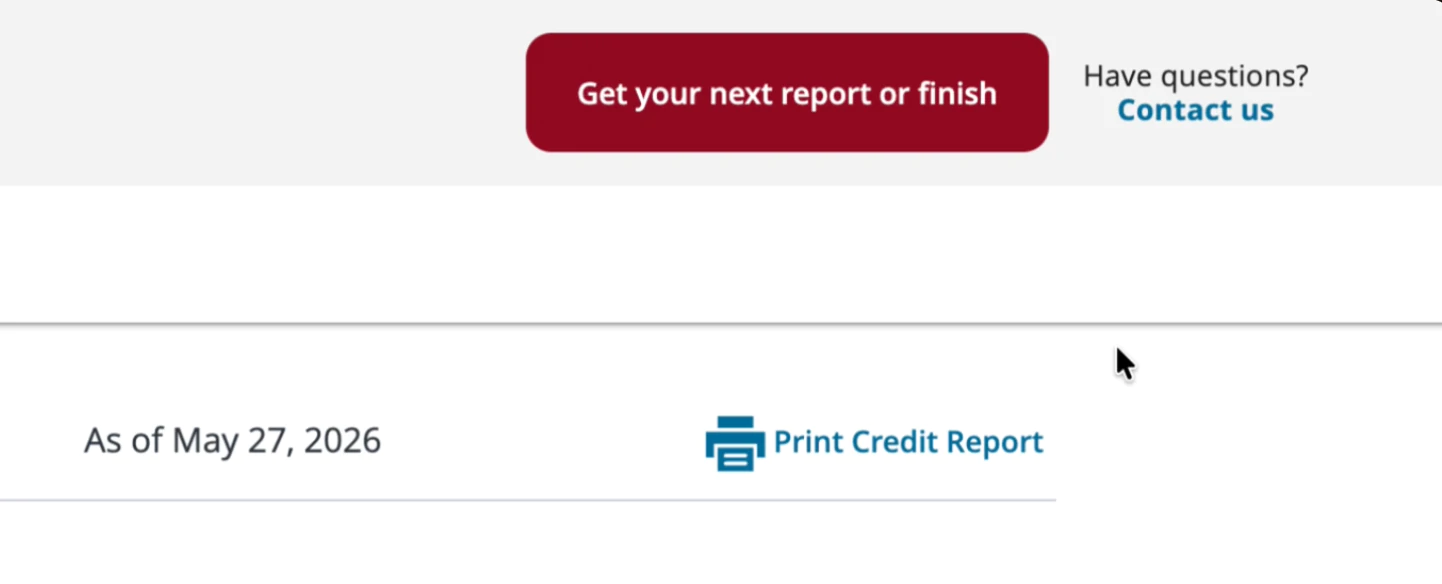
Click “Get your next report or finish”
It’s the red button at the top of the page, and it takes you back to AnnualCreditReport.com for the next bureau.
- 11
Confirm you’ve saved it
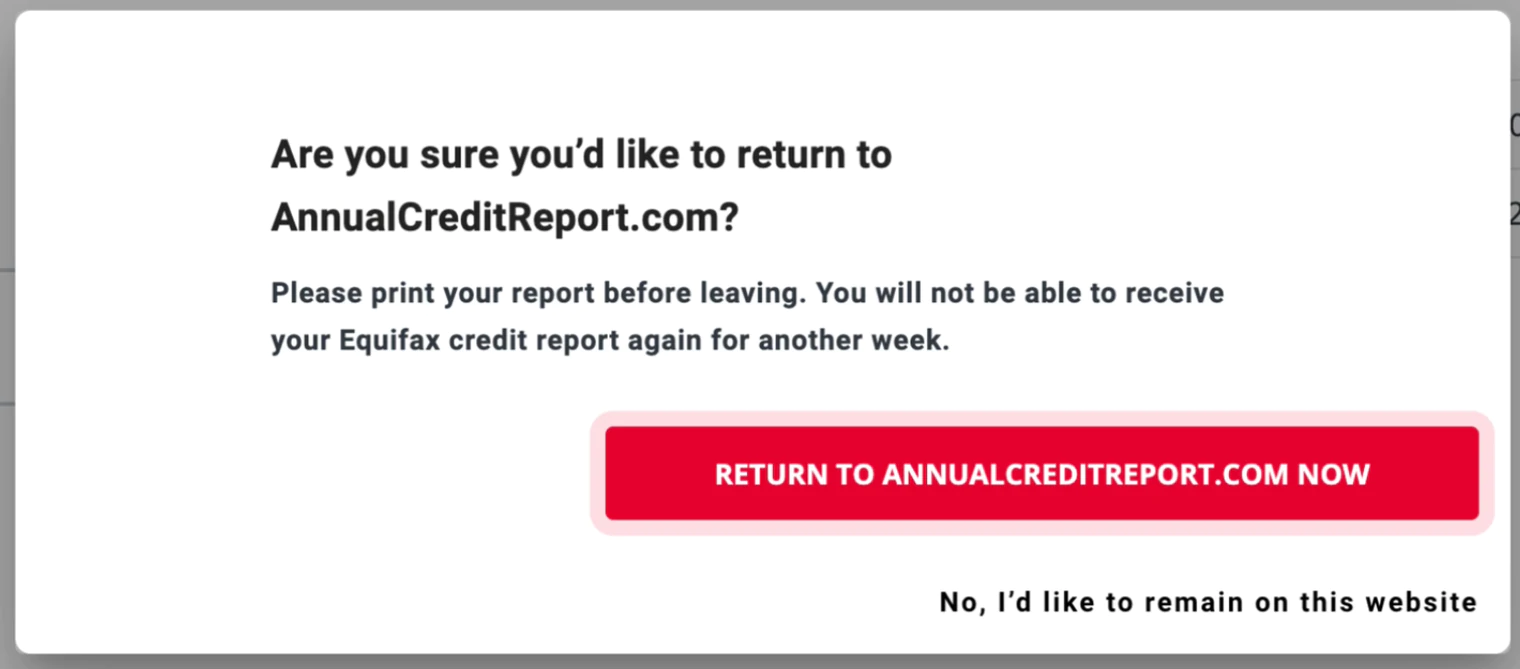
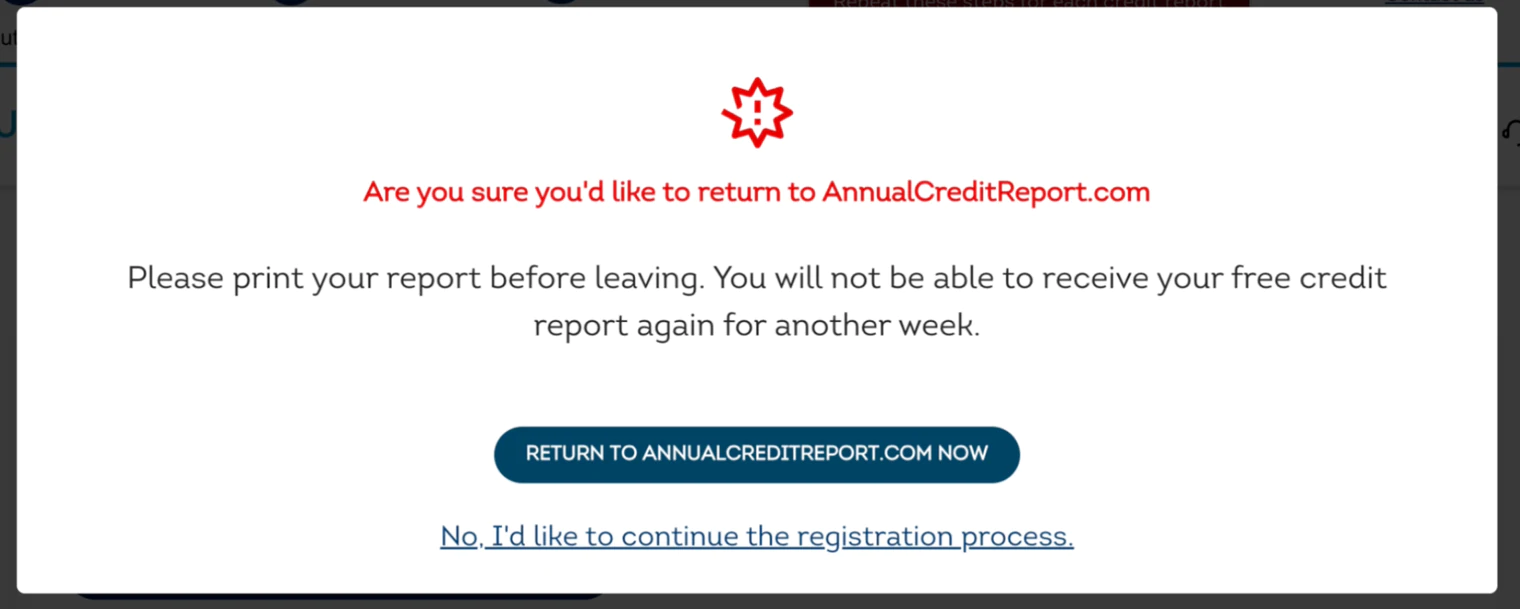
Equifax warns you before you go, and it isn’t bluffing: you won’t be able to get this report again for another week. With your PDF saved, click “Return to AnnualCreditReport.com now.”
Report 2: Experian
- 12
Equifax is done, so pick Experian
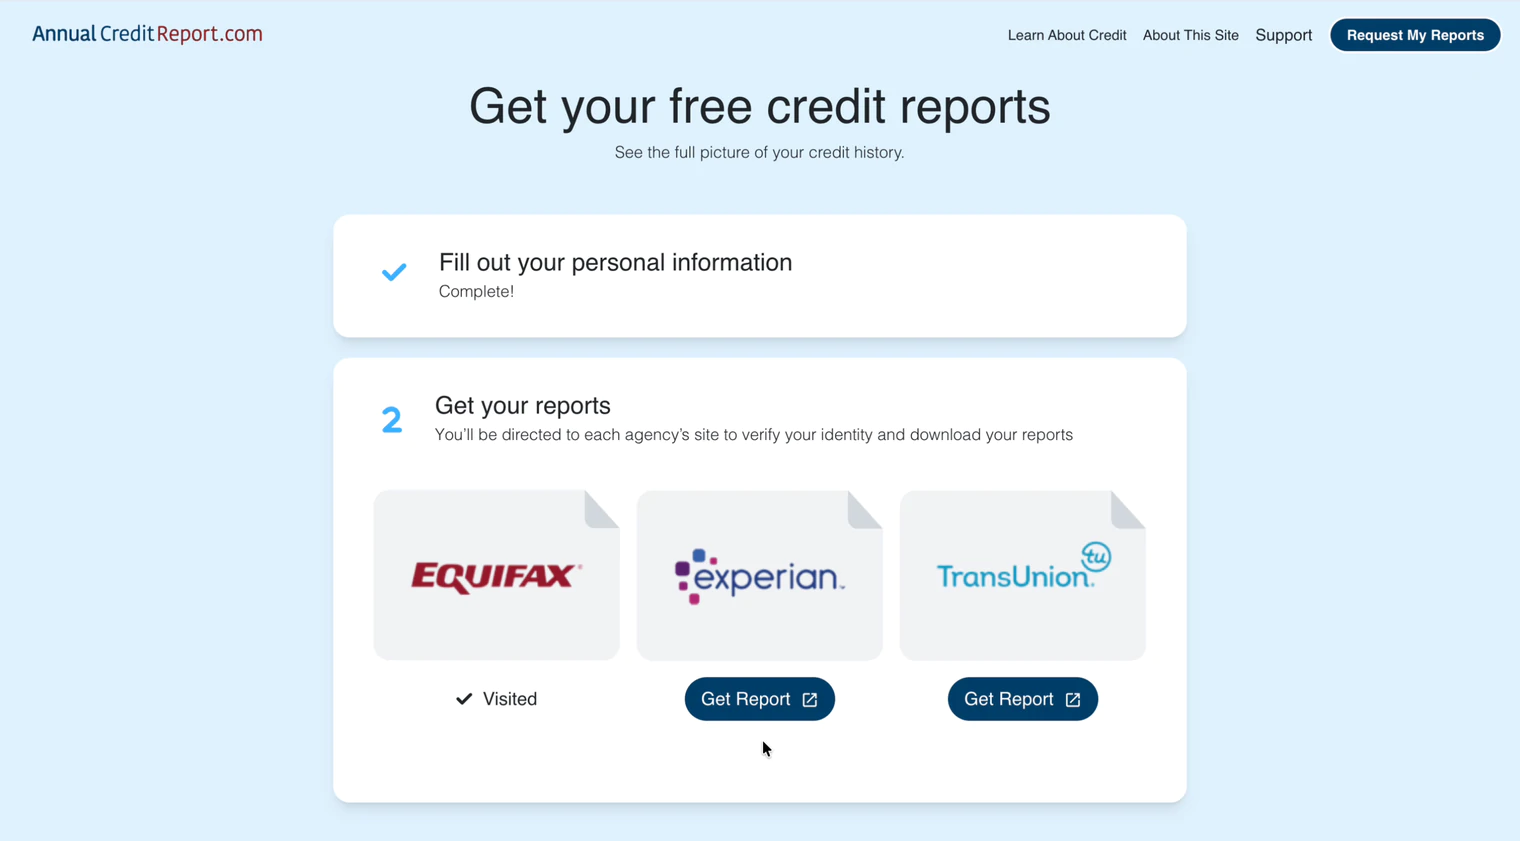
Back on AnnualCreditReport.com, Equifax now shows a checkmark and has lost its button. Click Get Report under Experian.
- 13
Verify your identity for Experian
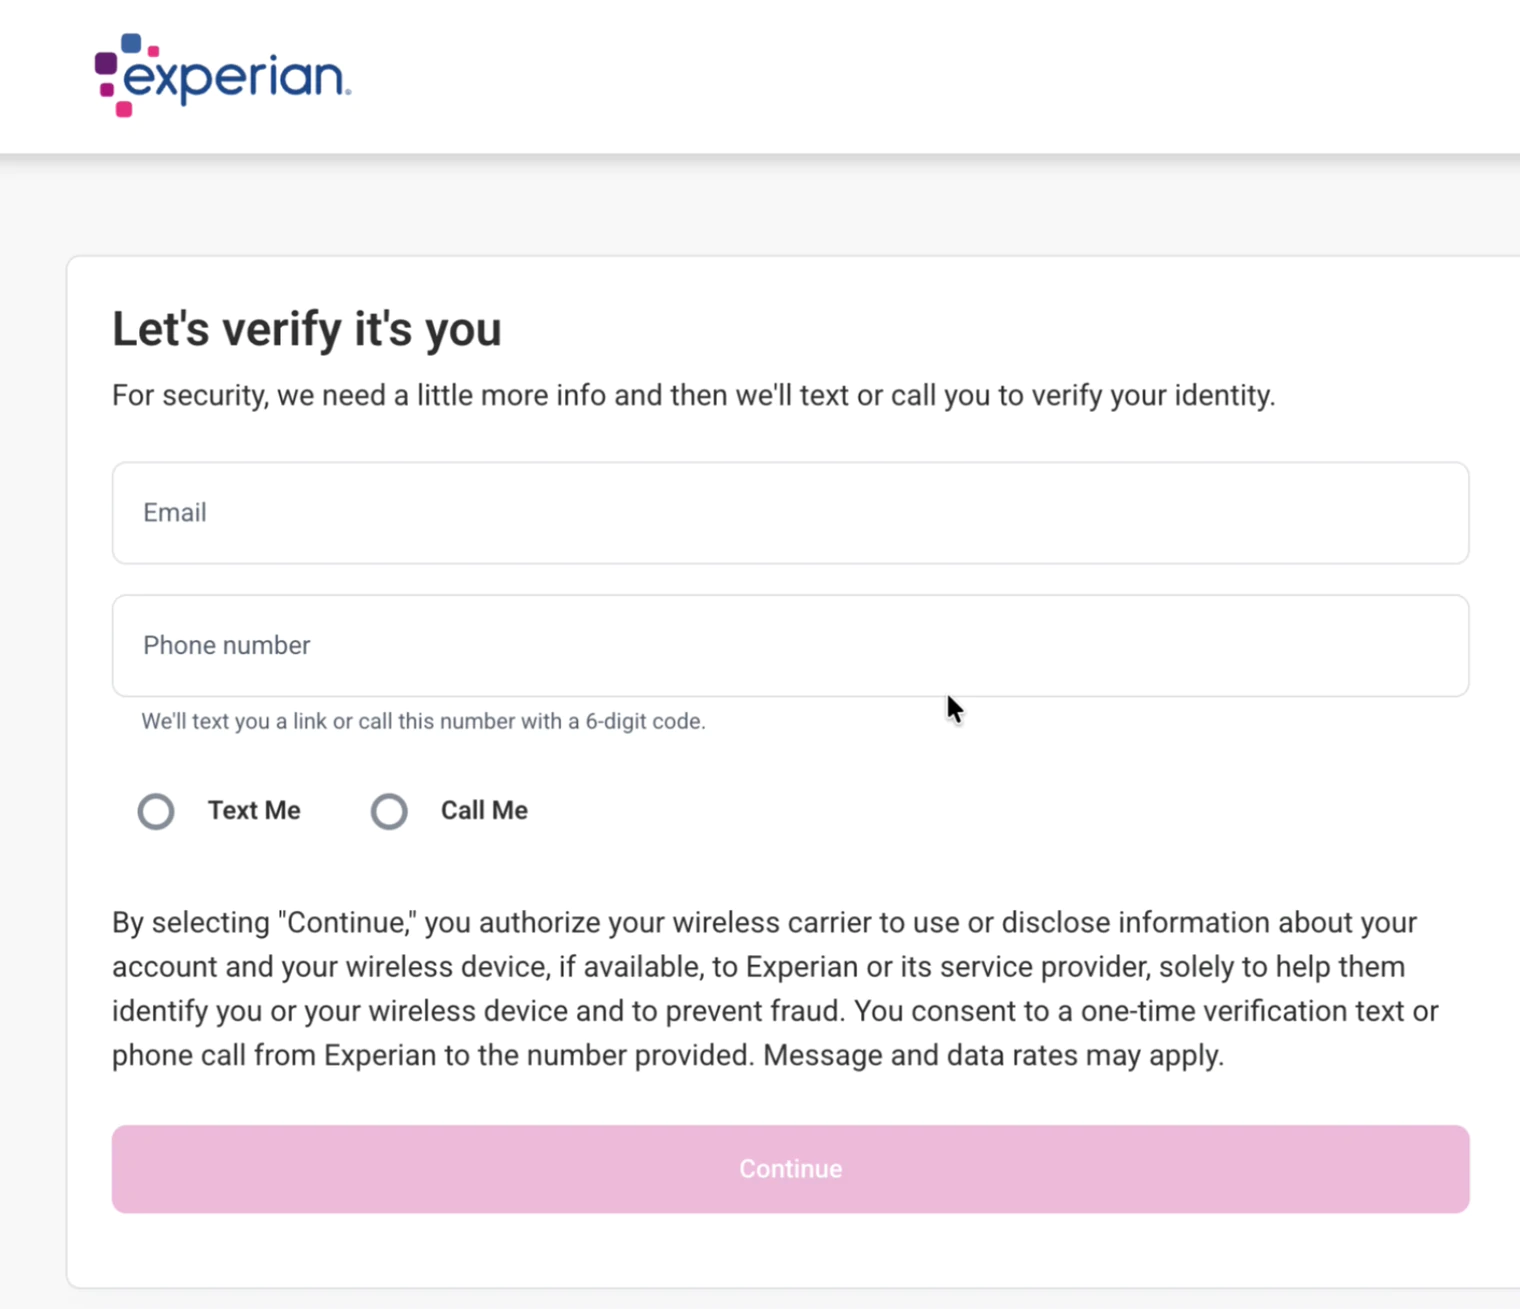
Experian wants your email and phone, then asks how to reach you. Pick Text Me or Call Me and click Continue.
- 14
Finish the check on your phone
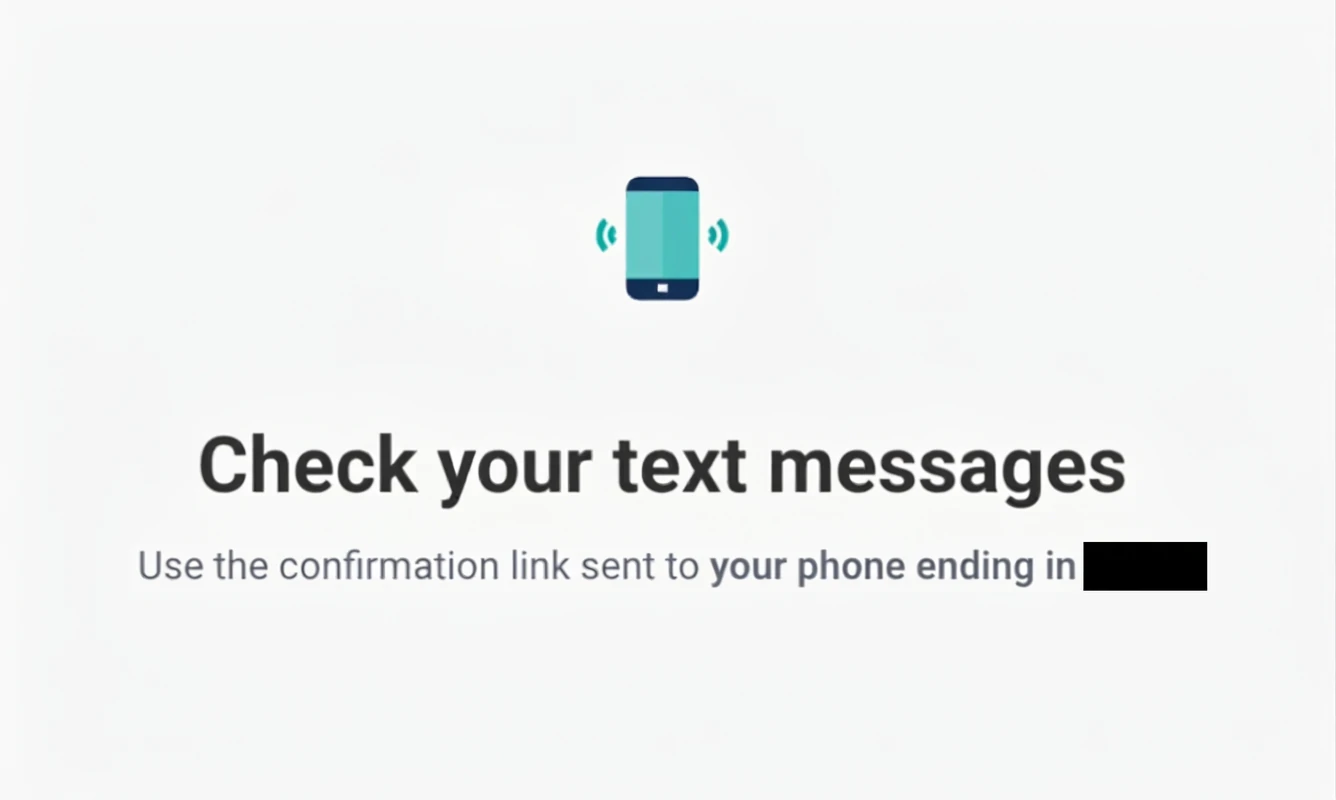
Experian texts you a confirmation link. Tap it on your phone.
- 15
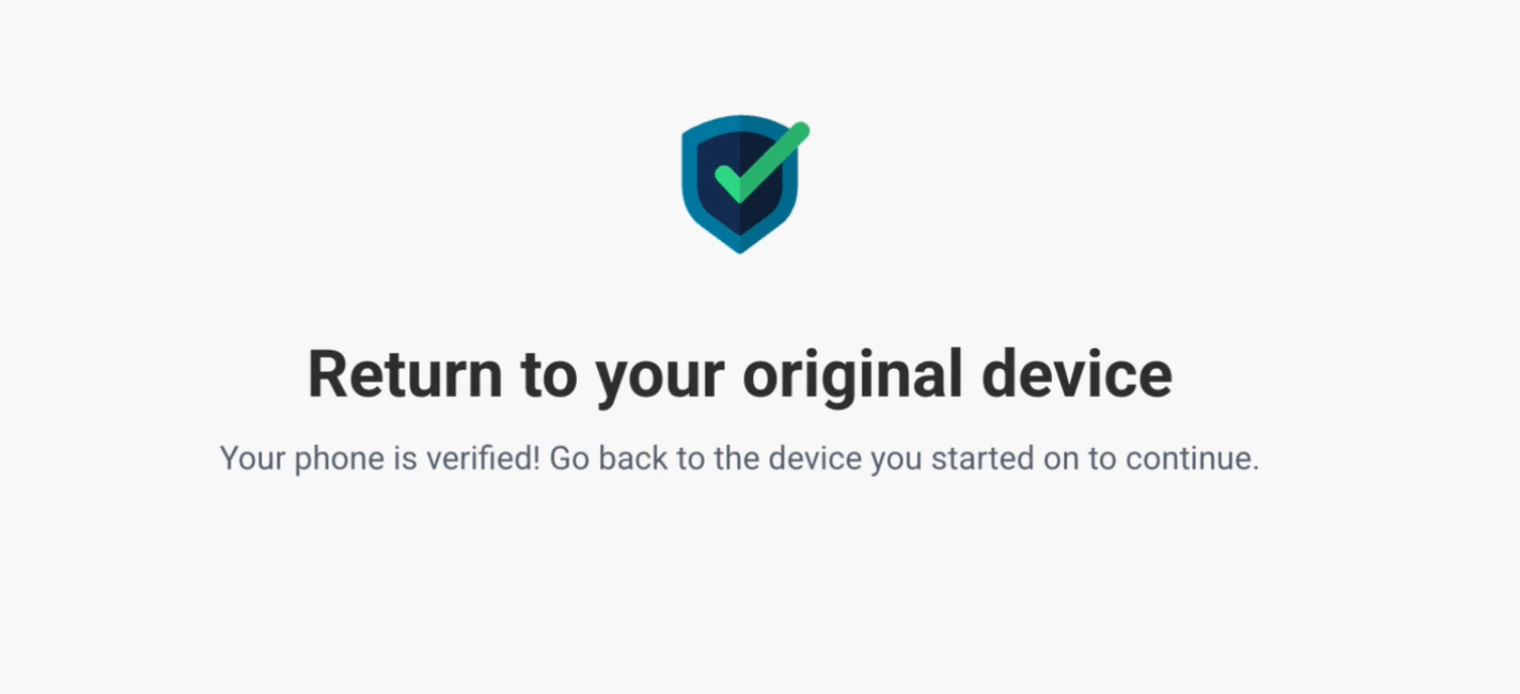
Return to your computer
Once your phone is verified, go back to the device you started on and Experian picks up where you left off.
- 16
Click the printer icon
It sits in the dark bar across the top of the report, labeled “Print or Save Report.”

- 17
Experian asks twice
The printer-friendly page it opens has a second button with the same name. Click that one too, then set Destination to “Save as PDF” in your browser’s dialog and name this file Experian.

- 18
Head back for the last one
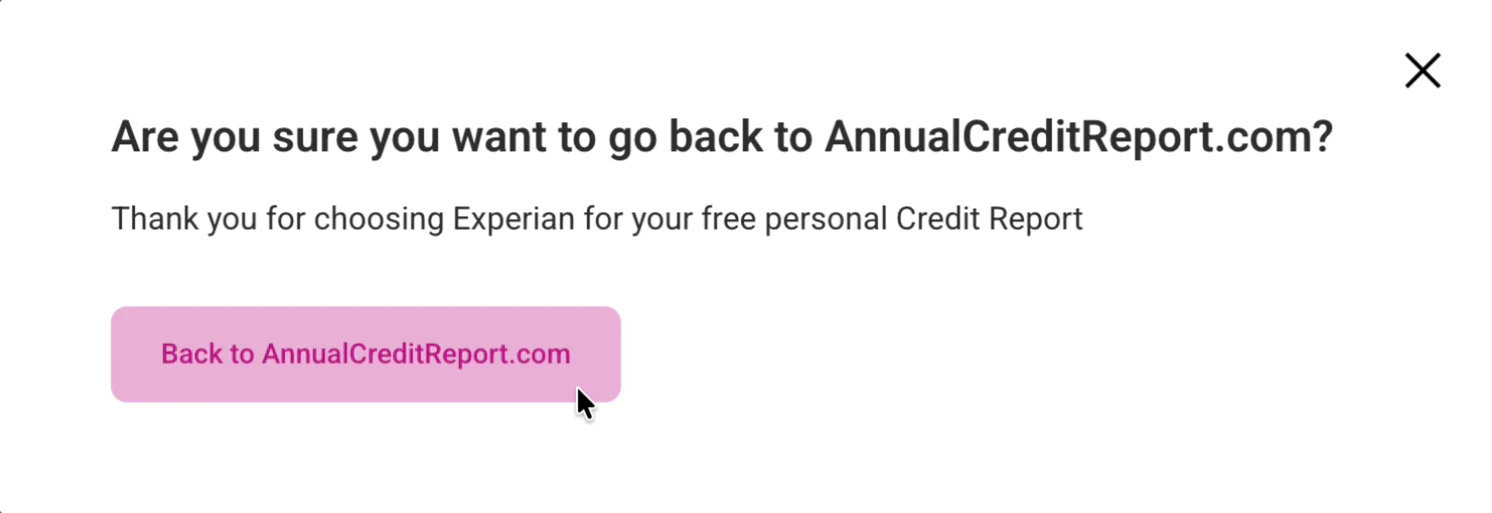
Click “Get your next report or finish,” then confirm at Experian’s prompt. Your PDF is already saved, so it’s safe to leave.
Report 3: TransUnion
- 19
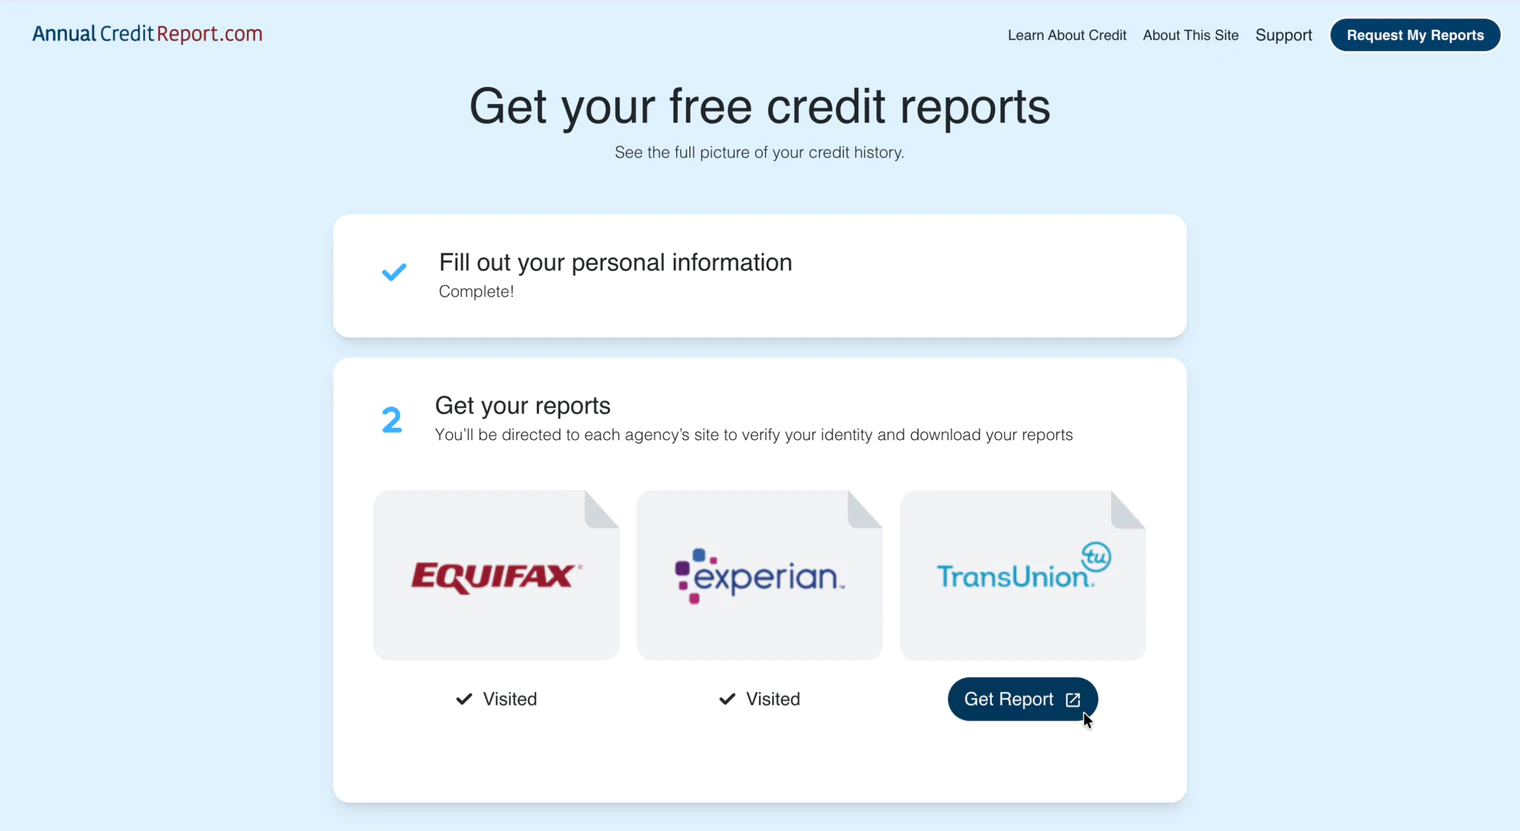
Two down, so pick TransUnion
Equifax and Experian both show checkmarks now. Click Get Report under TransUnion.
- 20
Confirm what TransUnion received
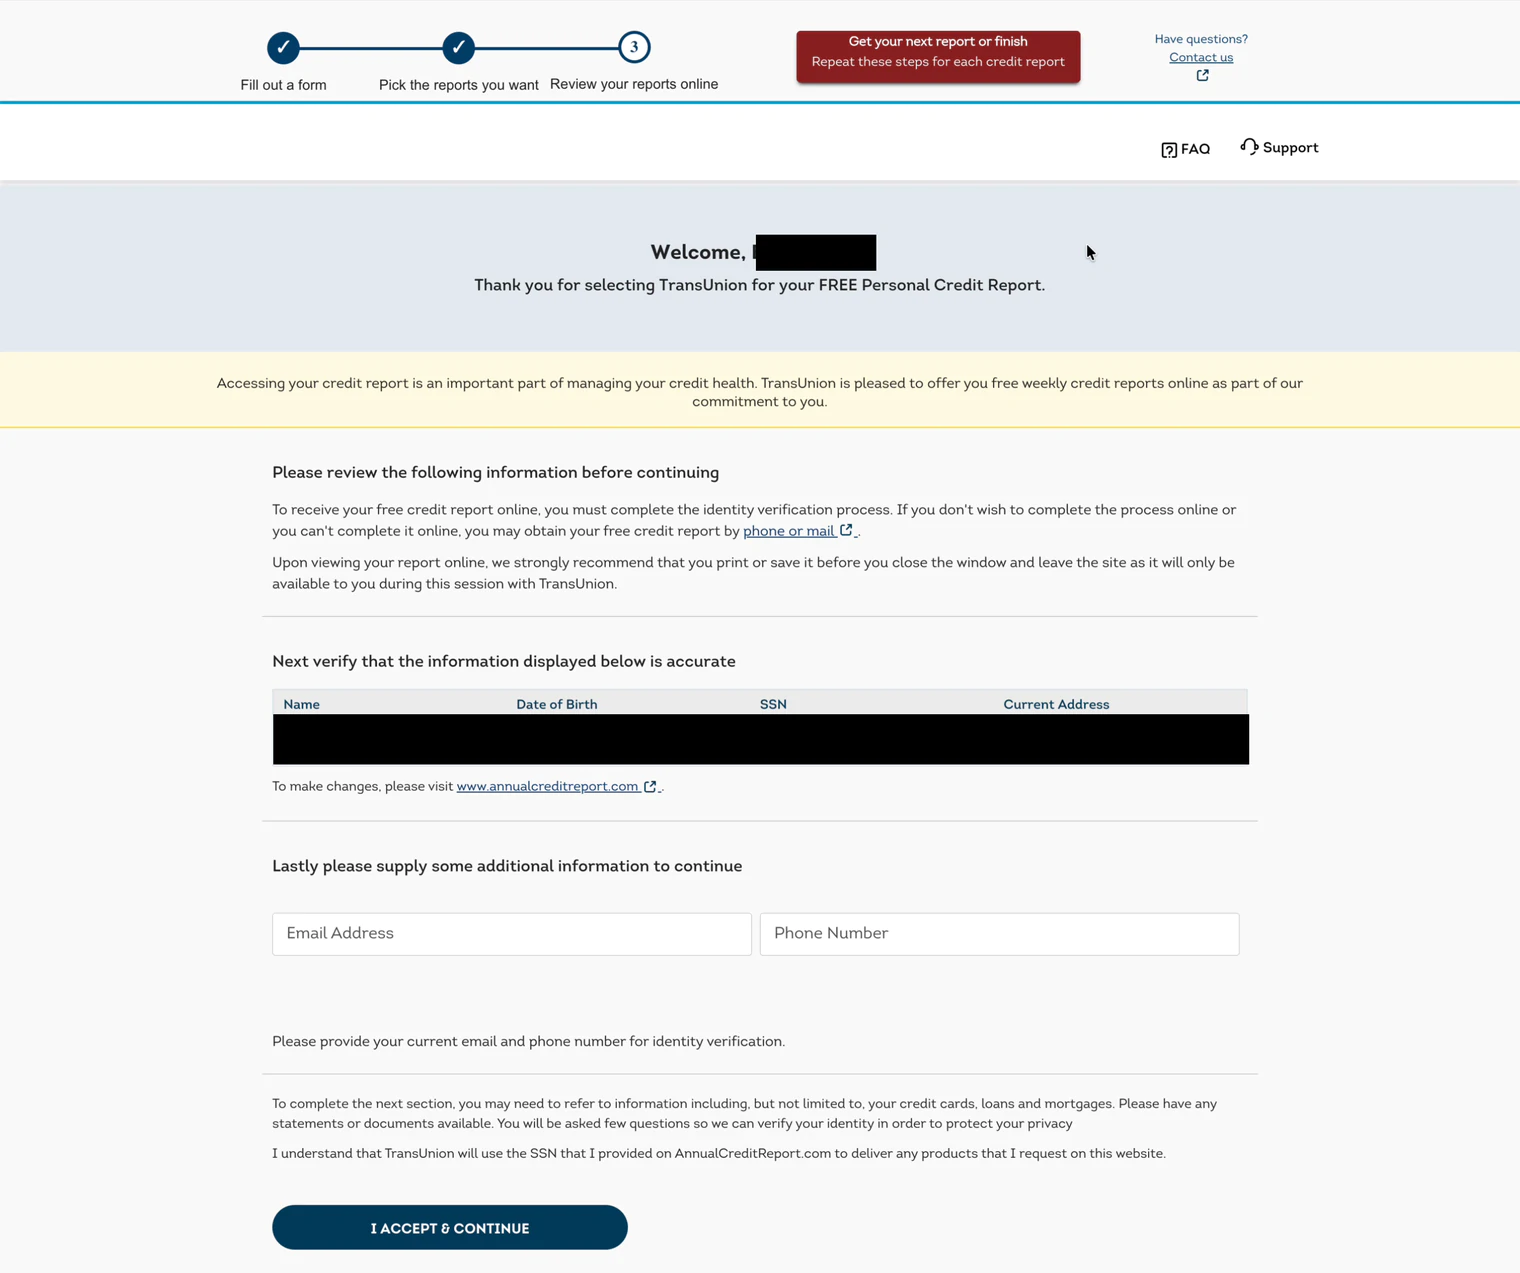
Check the name, birthdate, and address that AnnualCreditReport.com passed over, add your email and phone, then click I Accept & Continue.
Read their line about printing or saving your report before you close the window. Every bureau works this way. TransUnion is just the one that says it out loud.
- 21
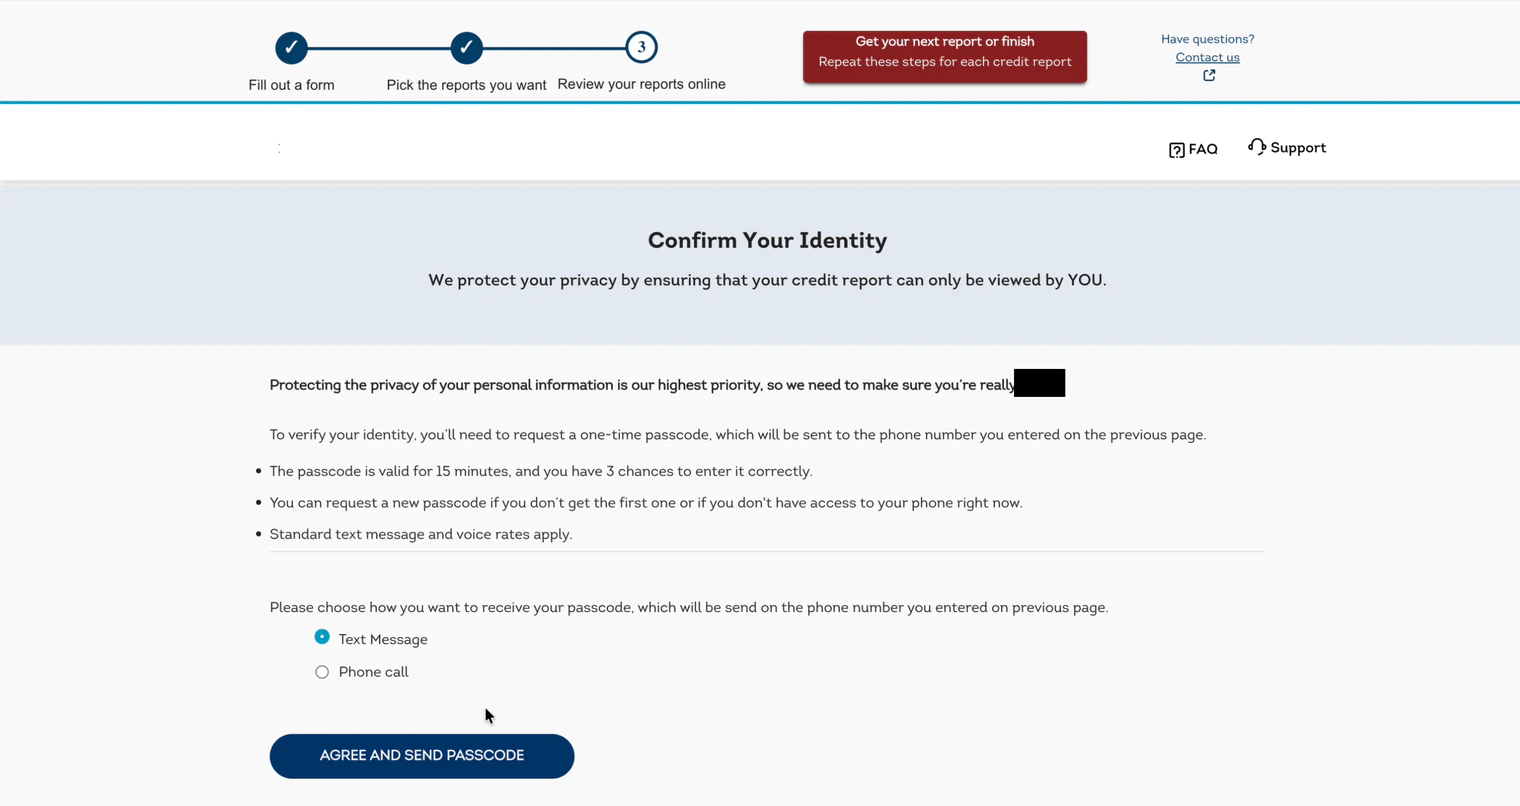
Choose how to get your passcode
Text Message is fastest. Pick one and click Agree and Send Passcode.
- 22
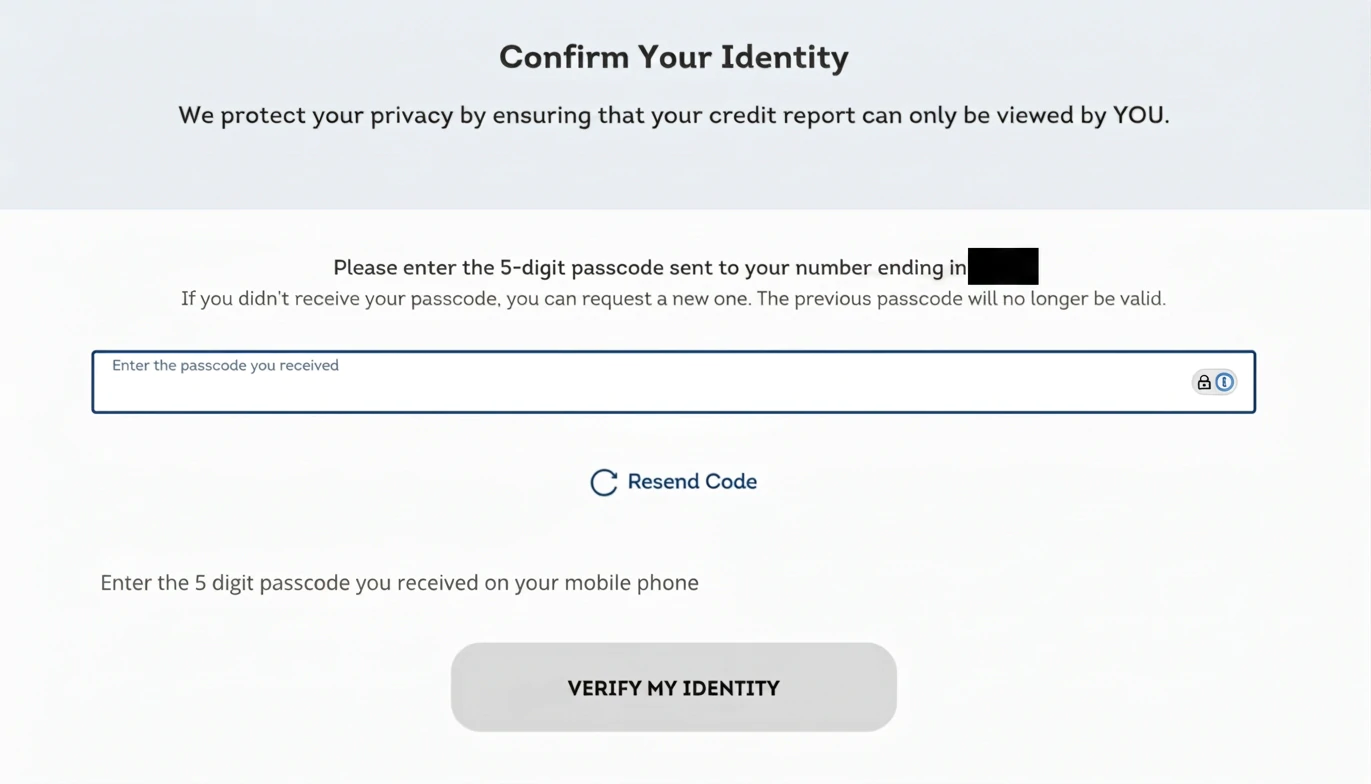
Enter the 5-digit passcode
Type the code from your phone and click Verify My Identity. It’s good for 15 minutes and you get three tries.
- 23
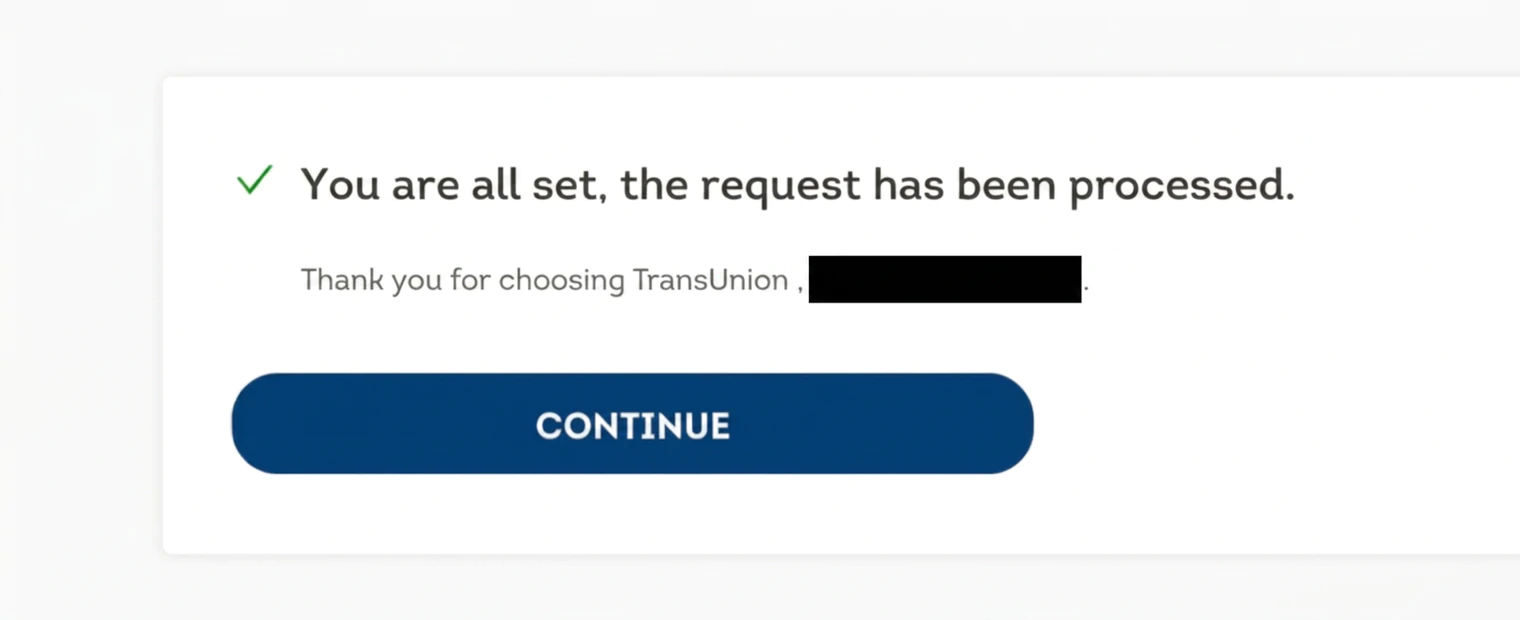
You’re all set
You’ll see a confirmation that the request has been processed. Click Continue to open your report.
- 24
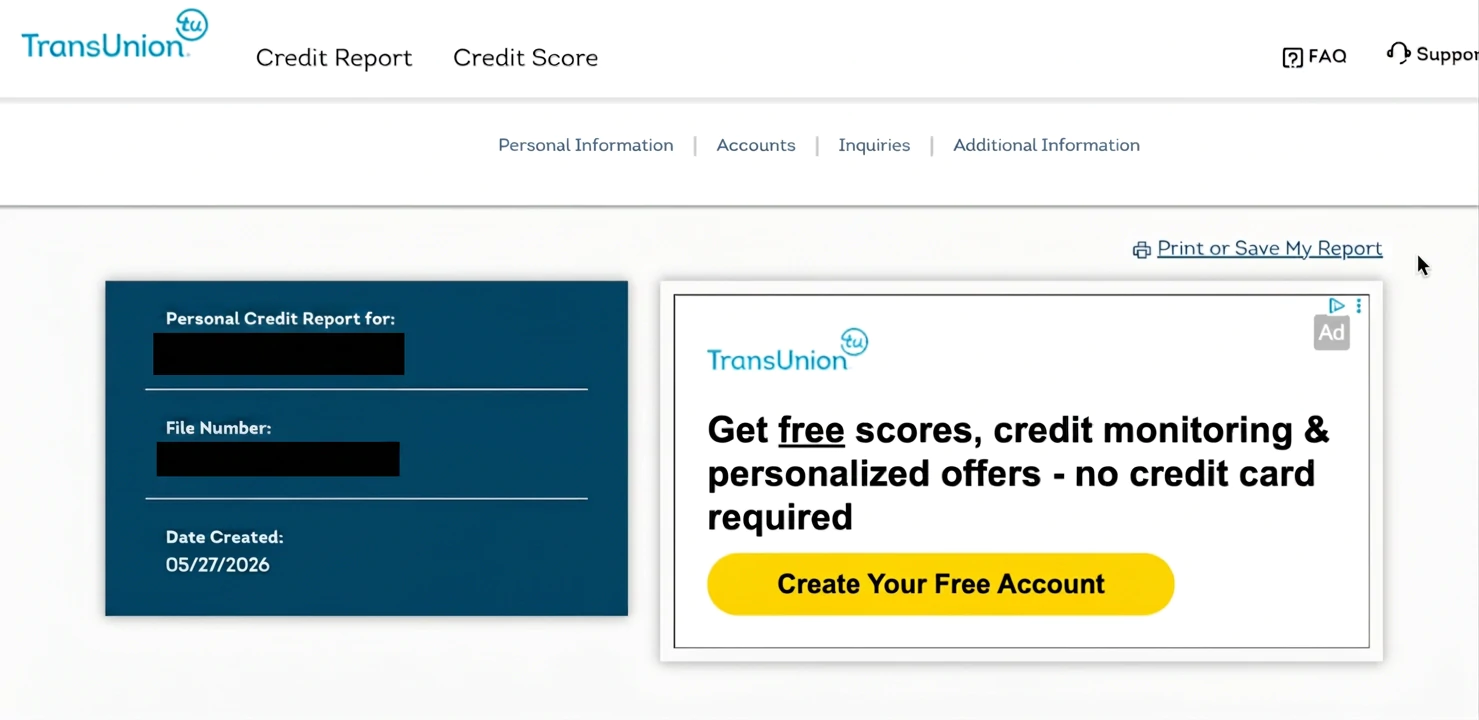
Save your TransUnion report
Look for “Print or Save My Report” in the top right, then save it as a PDF the same way you did the others. That’s all three.
- 25
Confirm you’ve saved it
One last warning before you leave. With your PDF safe, click “Return to AnnualCreditReport.com now.”
When it doesn’t go smoothly
- A bureau errors out before showing your report
- “We’ve experienced an issue processing your request” happens, and it isn’t something you did. Go back to AnnualCreditReport.com, move on to a different bureau, and try that one again later in the week.
- There’s no way to download or print
- Occasionally a bureau shows a banner saying printing is temporarily unavailable. You can call the number in the banner to have a copy mailed, or come back and try again.
- You closed the tab before saving
- That report is gone until your next weekly request. Nothing is lost permanently, and the other two bureaus are unaffected.
Got your PDFs?
You don’t need all three to start. Head back and upload whatever you managed to save.